AITech - Using Procedures and Any component blocks
Jul 25, 2016 karen's Blog
 This is a guest blog by MIT Master Trainer Sjaak Bosman
When components in your app have similar behavior, you can end up with a lot of blocks almost doing the same thing. Using Procedures and Any component blocks not only gives you the possibility to minimize the use of blocks, but also makes it easier for you to add new components and maintain your app in a more comfortable way.
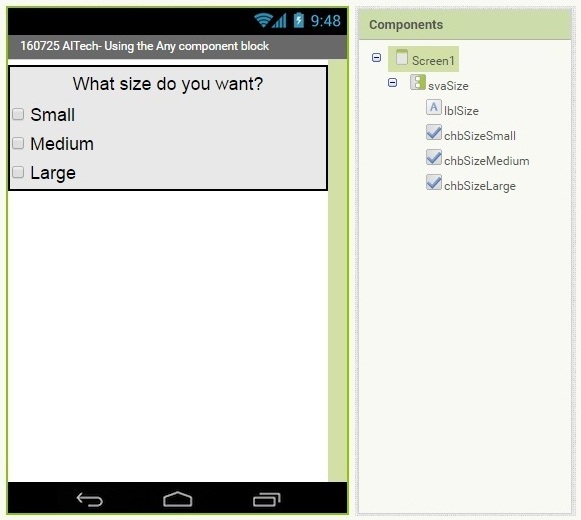 Figure 0.1 Design
To demonstrate this we are going to implement a group of 3 radio buttons using the CheckBox component.
At the end another CheckBox will be added to the group, to demonstrate the ease of using Procedures and Any component blocks.
Step 1. Straightforward
Pressing a CheckBox will fire its Changed event handler, in which we uncheck both other CheckBoxes. So far it doesn't look that difficult:
 Figure 1.1: Straightforward blocks
When the user presses Small, its CheckBox will be checked: A green check mark will appear and the Checked property of the chbSizeSmall component will be set to true.
When the users presses Medium next, Small will be unchecked. Now we expect Medium to be checked, but that is not what is happening:
 Figure 1.2 Press Small
 Figure 1.3 Press Medium
What is going on here?
Pressing Medium causes a Changed event for Medium (1). In the event handler the Checked property of Small is being set to false (2).
Because the Checked property of Small is true (figure 1.2), a Changed event will occur (3). As a result the Checked property of Medium will be set to false (4):
 Figure 1.5: Blocks
A Changed event for Medium will also occur again, because of the change from true (because of user action) to false (4), but that doesnt change anything anymore (setting Small and Large to false, what they are already are).
Step 2. Straightforward and working
So before we can optimize our blocks by using Procedures and Any component blocks, which is initially our plan and the meaning of this blog, we have to solve this little unwanted feature.
Our goal is to prevent the blocks inside a Changed event handler from being executed when it was not fired because of user action. To do so we are going to use its Enabled property.
First all the blocks inside the Changed event handler will be moved into an if-then control block (blocks in the red rectangle). The if-condition will be the Enabled property of that CheckBox. As a result the blocks in the then-part will only be executed if the Enabled property of that CheckBox is true.
Next all CheckBoxes have to be disabled (by setting the Enabled property to false) before changing the Checked property of the other CheckBoxes. Finally all CheckBoxes must be enabled, to make them available to the user again.
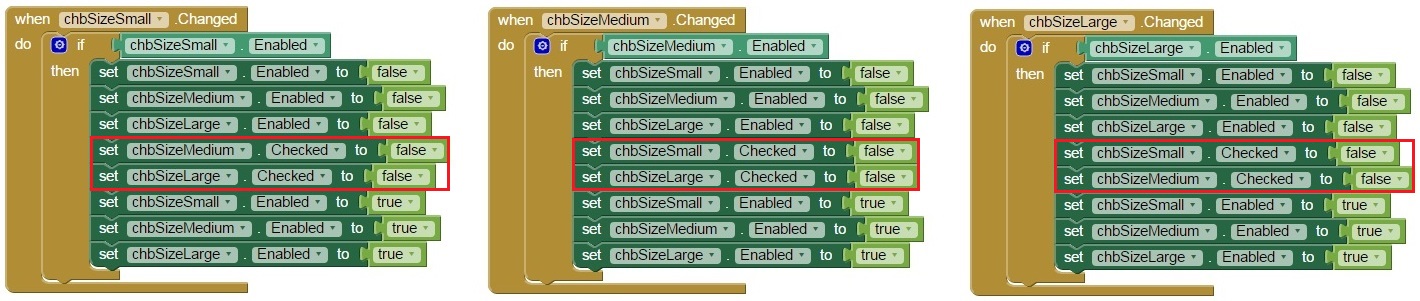 Figure 2.1: Straightforward blocks
Now its almost working:
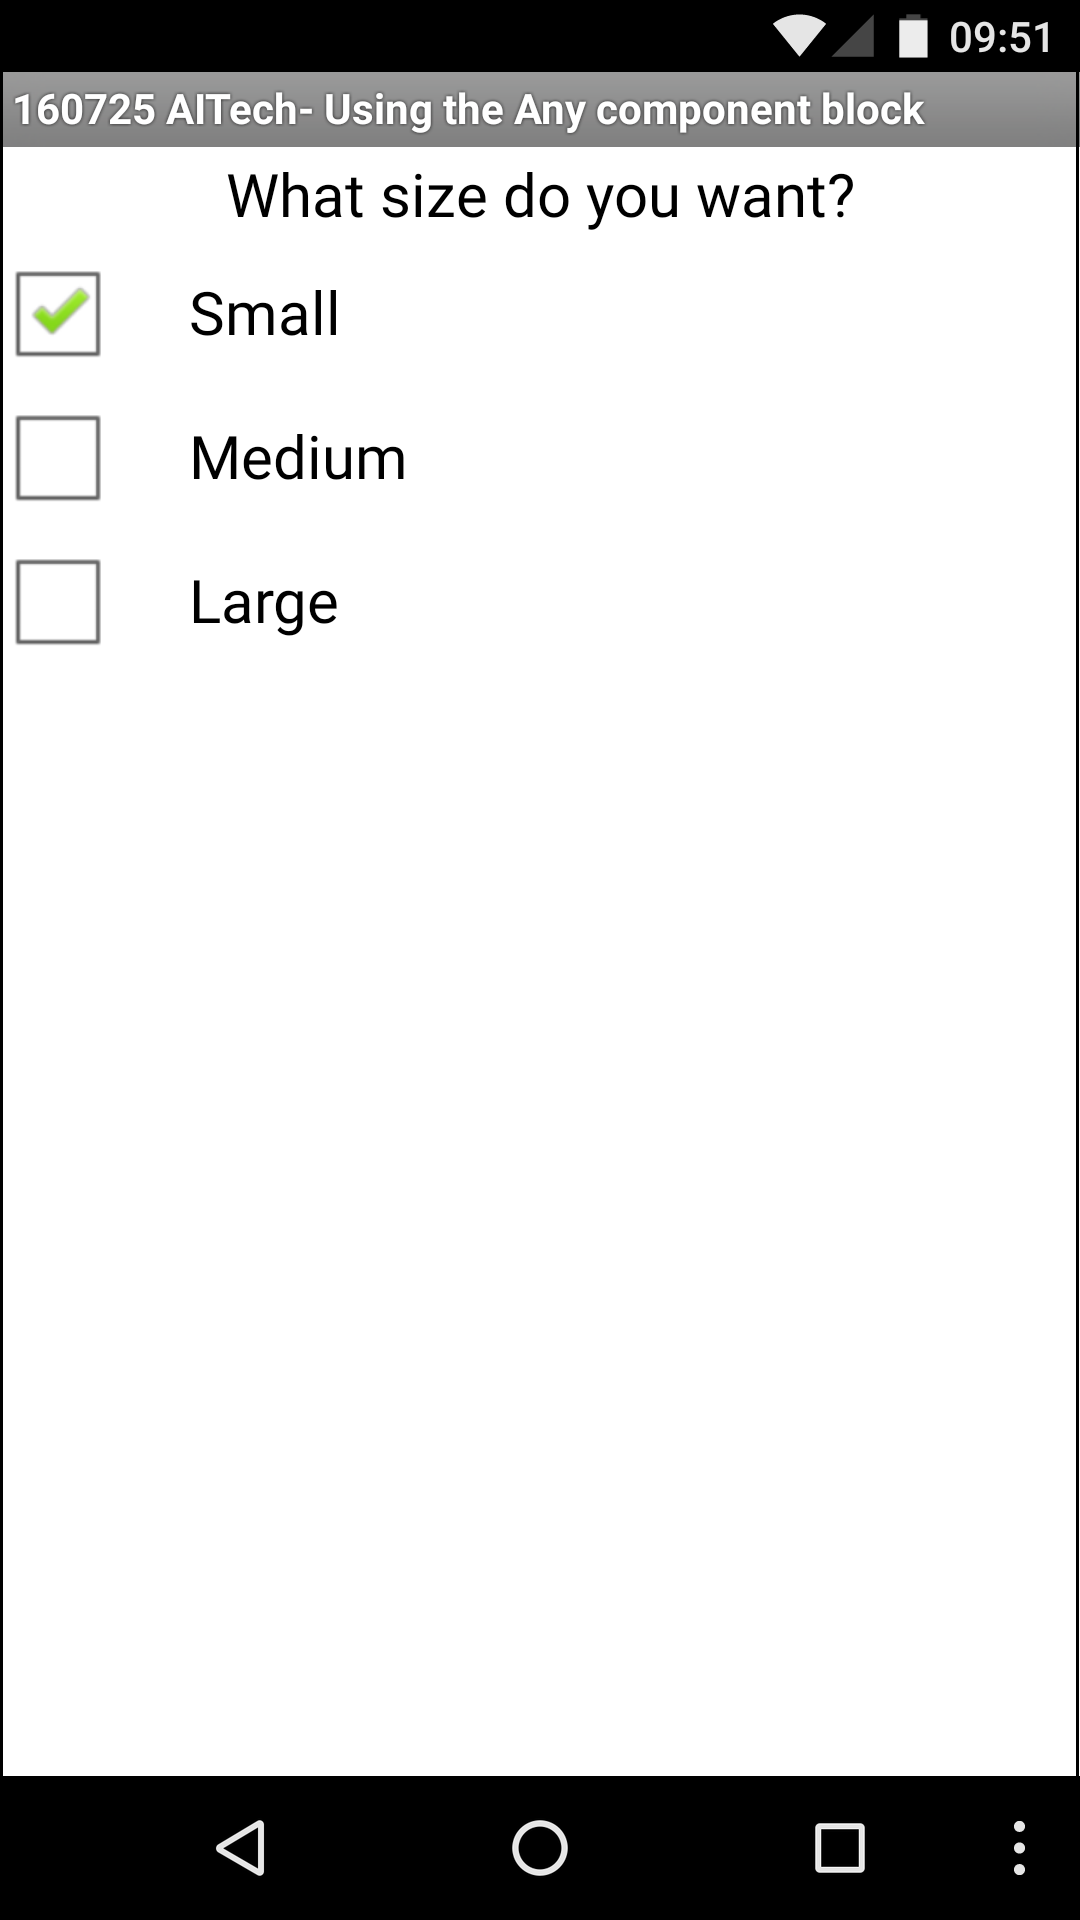 Figure 2.2: Press Small
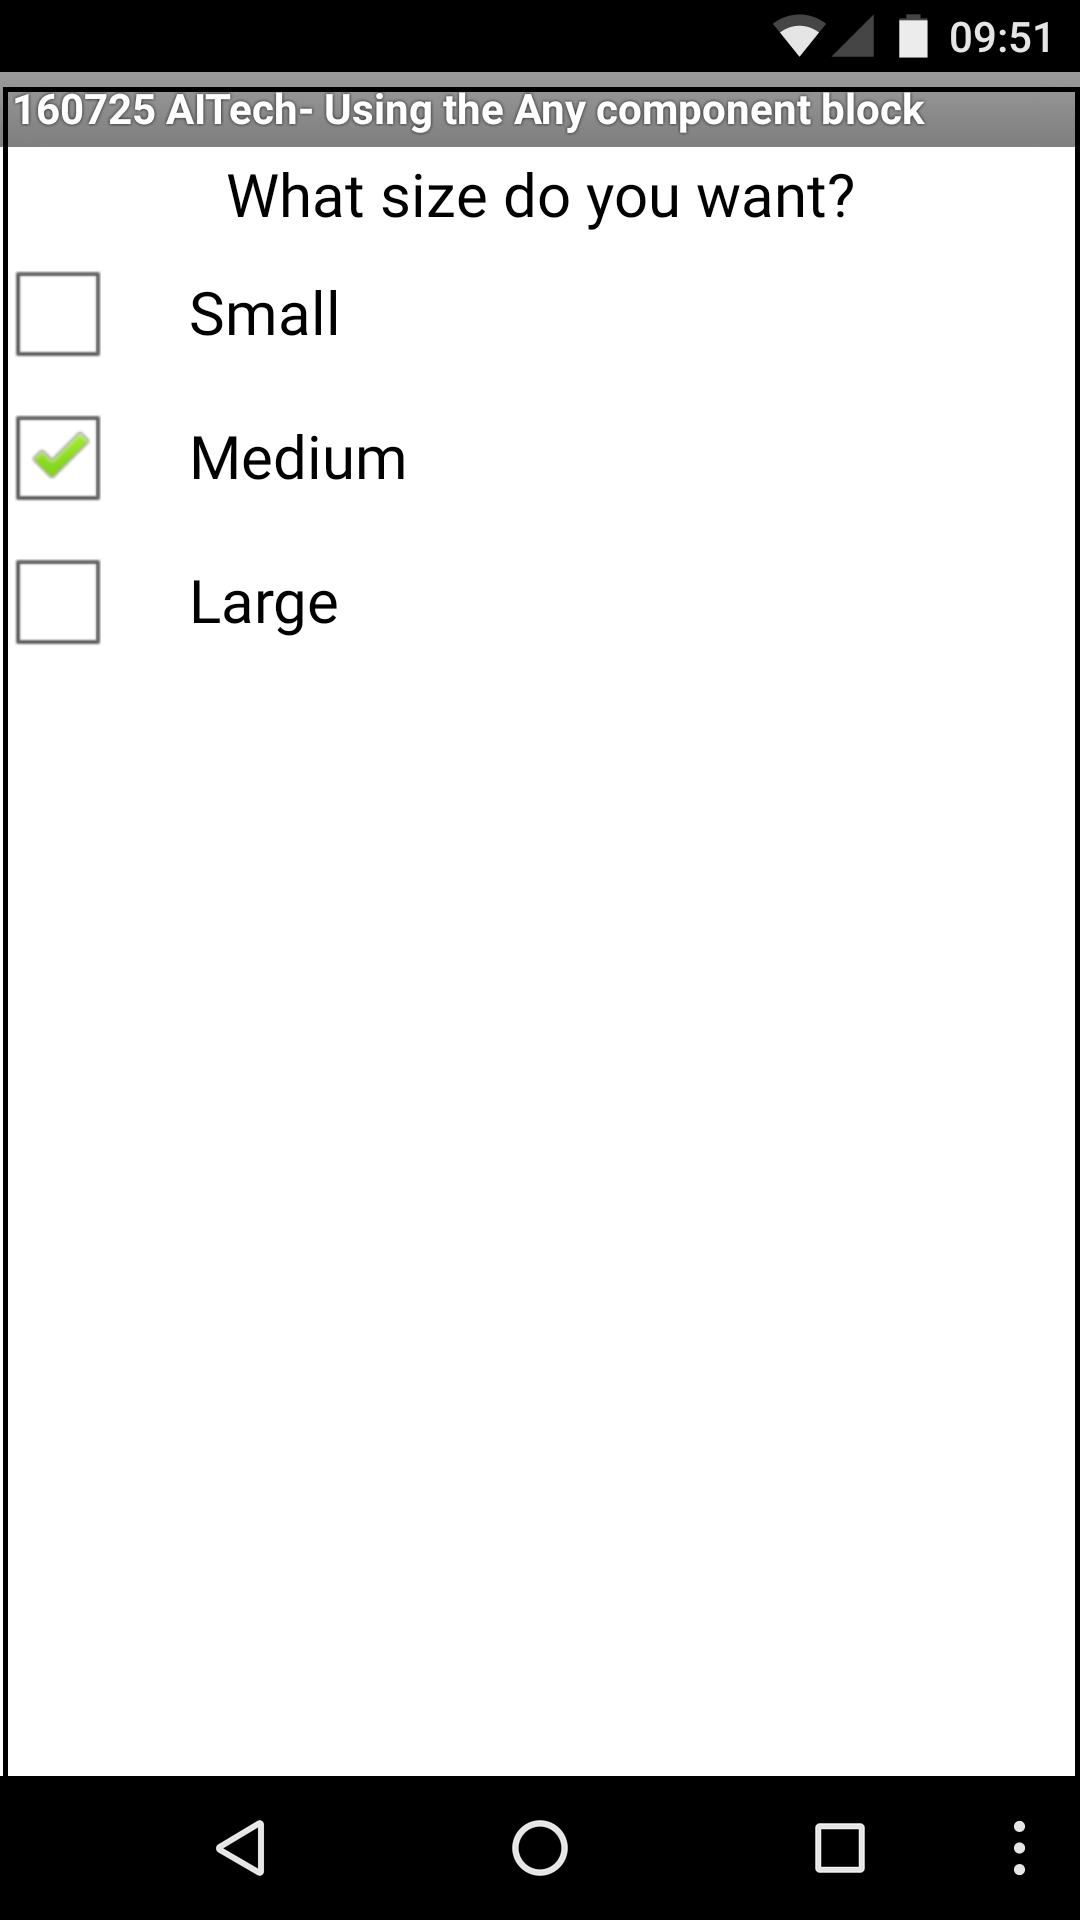 Figure 2.3: Press Medium
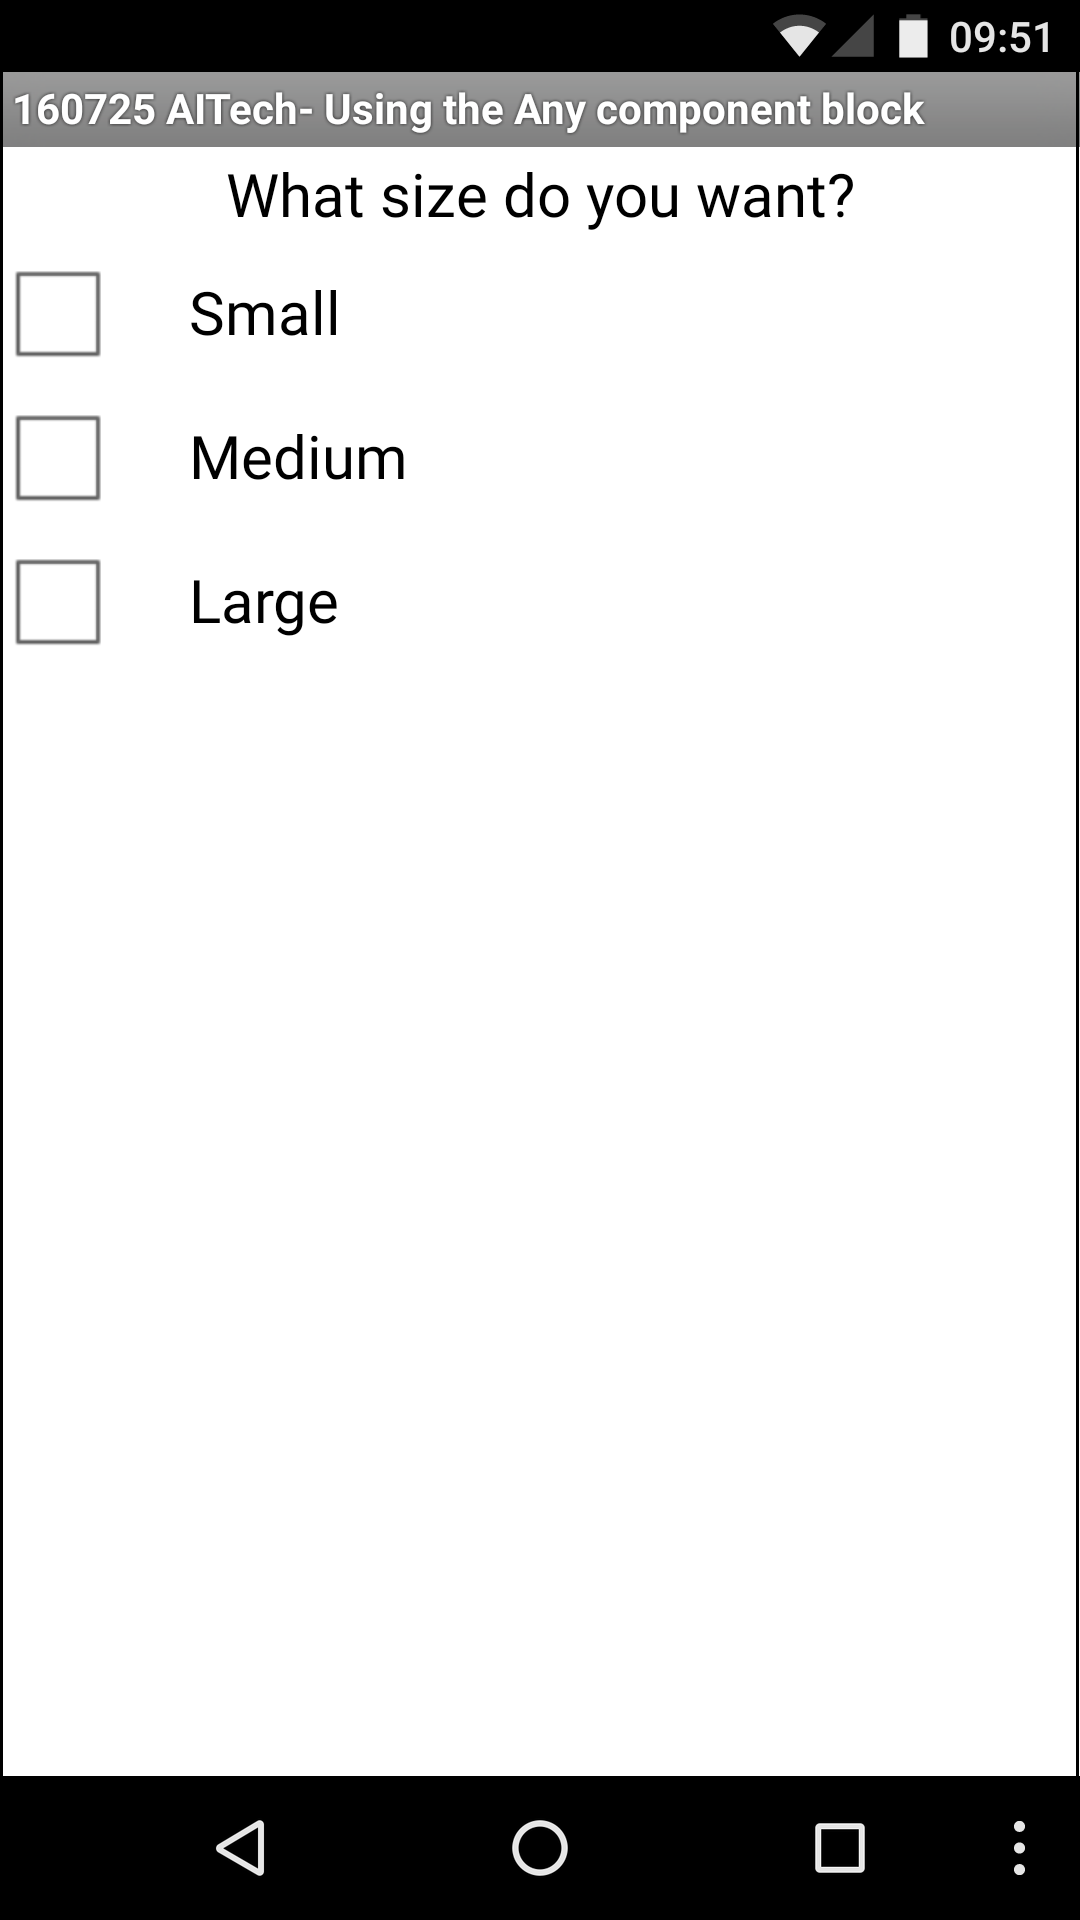 Figure 2.3: Press Medium again
Pressing a checked CheckBox (figure 2.3) results in all CheckBoxes being unchecked. That issue will be solved in Step 5.
As you can see, each event handler holds a lot of the same blocks: Setting the Enabled property of all CheckBoxes to false and, after setting the Checked property of the other CheckBoxes to false, back to true. If you add another CheckBox to this group of radio buttons, you will have to add a lot of blocks in lots of different places.
Step 3. Introducing a Procedure
This is the moment where it is handy to use a Procedure to concentrate functionality in one place. Except for the if-then control block, all blocks can be moved to the newly created procedure. Of course identical blocks can then be deleted. You can find the Procedure blocks in the Built-in section of the Blocks pane in the Blocks editor.
Because setting the Checked property of the other CheckBoxes to false (figure 1.5) depends on which CheckBox was pressed, this has to be done conditionally. Therefore the Procedure must know which CheckBox was pressed, which can be realized by adding an input parameter to the procedure (click the small blue square in the upper left corner of the Procedure block to add an input parameter):
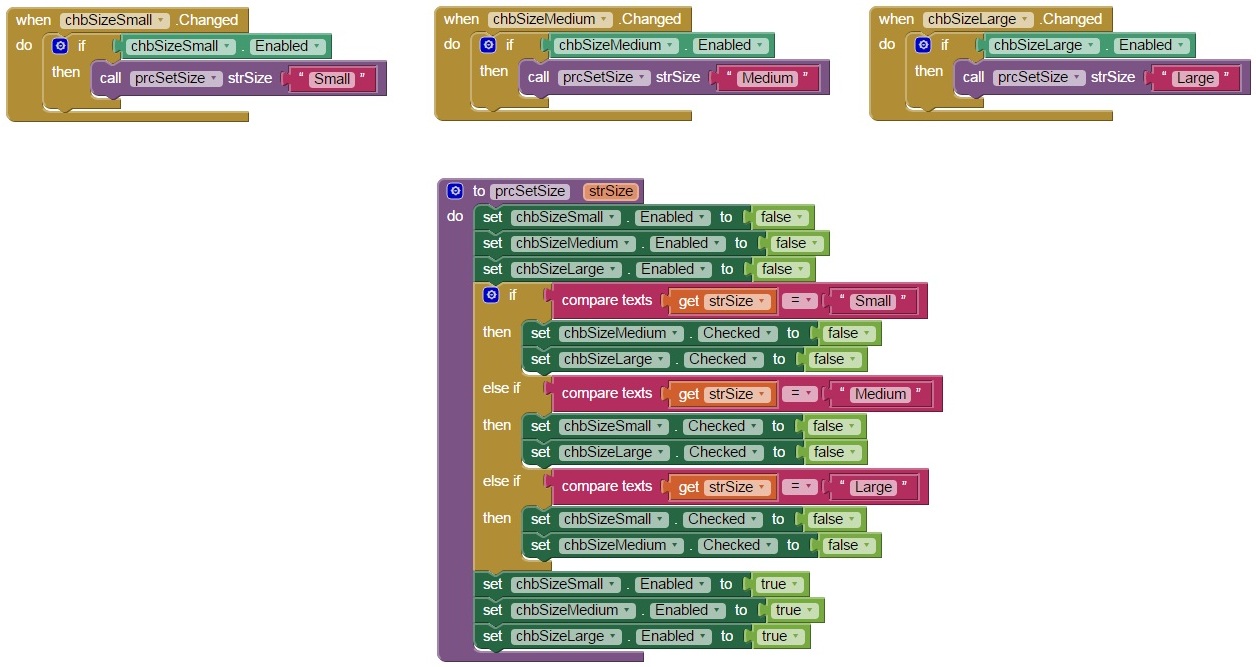 Figure 3.1: Procedure blocks
Yet this is still not a generic situation. In the Procedure we must check for the value of the input parameter to determine for which CheckBoxes the Checked property must be set to false.
Also, if we add another CheckBox later on, the Procedure must be modified to include blocks for the new CheckBox.
Step 4. Introducing the Any component block
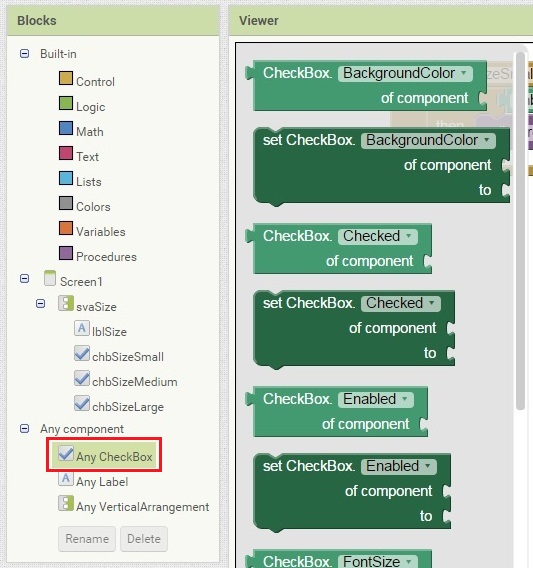 Figure 4.1: Any component properties
To implement a generic solution we are going to use the Any component blocks, in our example the Any CheckBox component.
They look like the specific property blocks equivalent, but in addition give you the possibility to specify the component for which you want to set or get a property.
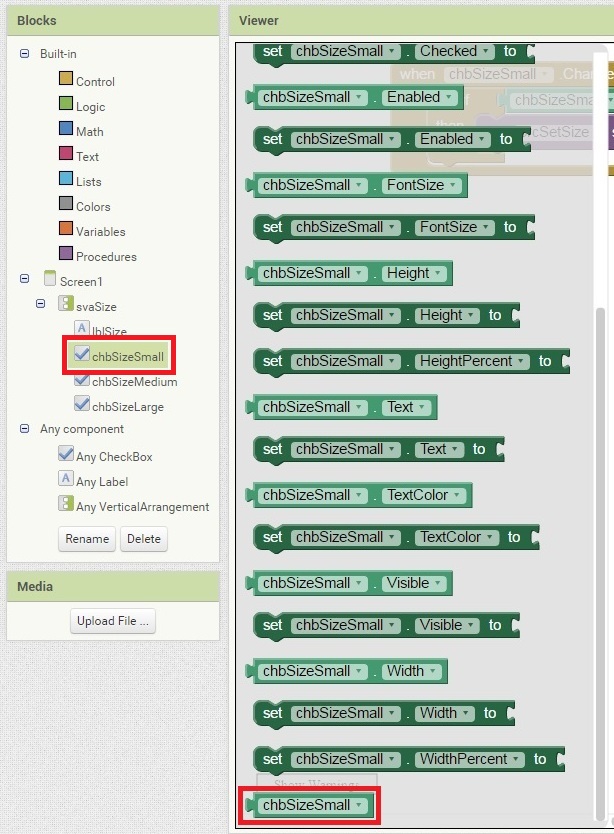 Figure 4.2: Component as property
One property of a component is the component itself. It can be found at the bottom of the list of the components event handler and property getters and setters.
To be able to process all CheckBoxes, we add them to a list (1a) which can be processed by a for-each control block. Adding of the CheckBoxes to the list cannot be done upon initialization of the variable and therefore has to be done upon initialization of the app (1b).
To let the procedure know which CheckBox it concerns, the CheckBox itself can be passed as parameter (3a and 3b). The if-condition to check if the CheckBox is Enabled has the same structure for all our CheckBoxes, and can now be moved to the Procedure too (2).
The for-each loop (4) returns one CheckBox component from the list at a time and stores it in a local variable. Now we are able to set the Enabled property to false for all CheckBox components in our radio button group in just a single block (5).
Next all Checked properties must be set to false (6b), except for the CheckBox that was pressed (6a).
At last all CheckBoxes must be Enabled.
 Figure 4.3: Any component blocks
This powerful combination of a list, for-each loop, Any component blocks and a Procedure gives you the ability to create flexible apps that are easy to modify and expand.
Step 5. Adding another CheckBox
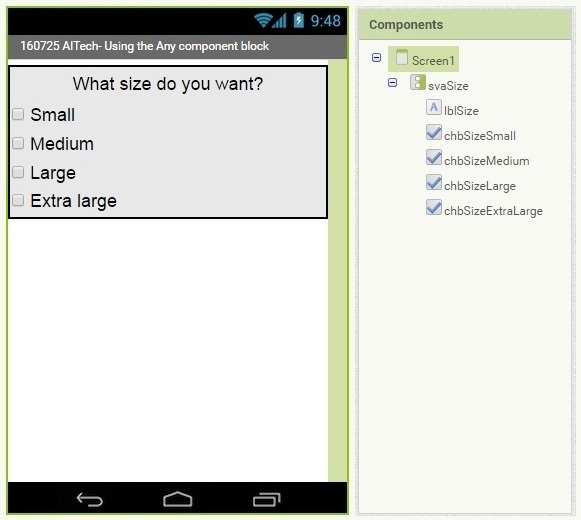 Figure 5.1: Design
Another CheckBox will be added to the radio button group, to demonstrate the ease of using Procedures and Any component blocks.
Adding another CheckBox to the Radio button group now only consist out of a few simple steps. First add the CheckBox to the designer.
In the Blocks Editor you have to add the newly created CheckBox to the list (1) and add its Changed event handler (2). Thats all!
Maybe you noticed that a Checked CheckBox can be unchecked, leaving the radio button group with no selection at all. If you dont want that to be an option, force the concerning CheckBox to true (3). Prior to this now all CheckBoxes can unconditionally be set to false, which makes our Procedure even easier.
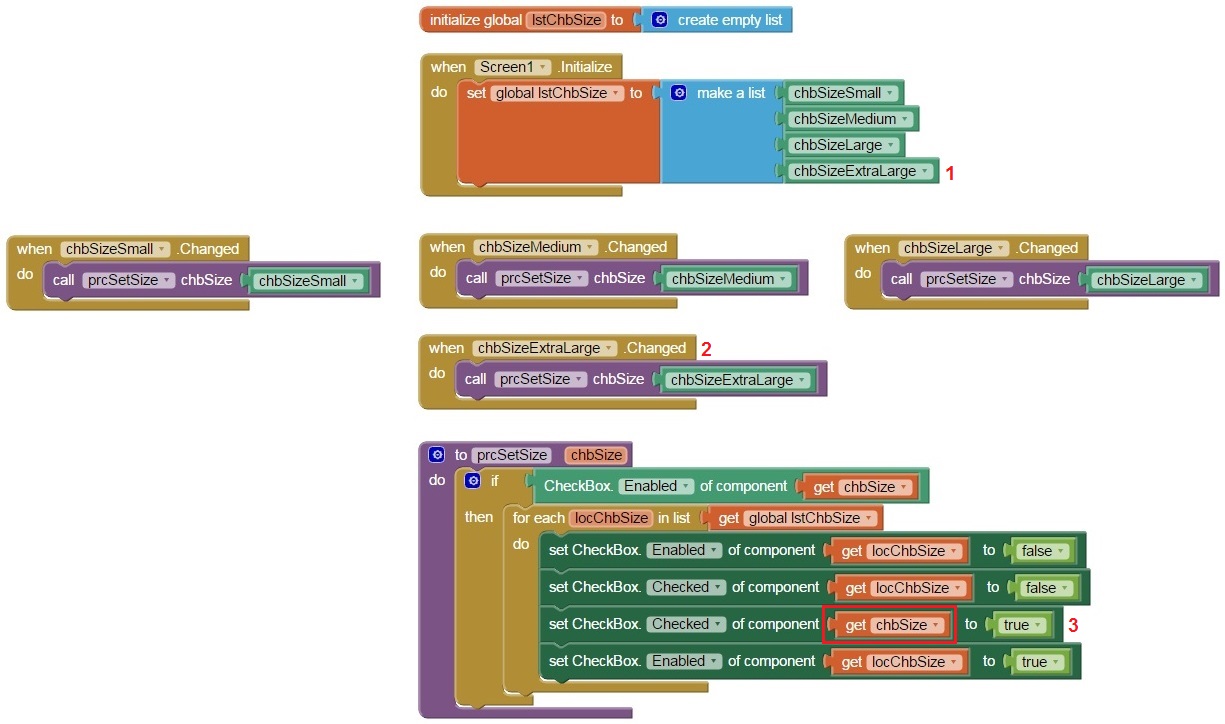 Figure 5.2 Extra CheckBox Blocks
Suggestions or questions? Please send an e-mail to AI2MMT@gmail.com.
MIT App Inventor


This work is licensed under a Creative Commons Attribution-ShareAlike 4.0 International License.
Terms of Service and Privacy Policy
Other inquiries: Email
GitHub: mit-cml
Accessibility: accessibility.mit.edu